mercredi 20 juillet 2016

Wall Panel Change to UVs

Made some changes to the wall panel UVs and geometry as well. I created a digital asset that allows me to change the pipe along the bottom. I also made it for the vents on the bottom to change to ground lights as well. Still up in the air on what to texture this in. I am going to use either 3D Coat, Substance Painter or MARI. I like the idea of the new Substance Painter 2.0 having UDIM support. This will really help in my workflow, especially since I am use to breaking UVs up for MARI.

UVs were setup fairly easy using Houdini UV tools.


lundi 18 juillet 2016

Tiled floor in 3D Coat

I haven't created tiled textures in 3D Coat in a while. I came across this 'Intro to 3D Coat' tutorial from David Lesperance on Gumroad. https://gumroad.com/metalman123456123 He has a lot of great tutorials for sale on Gumroad. Check them out if you can.

I was going through his tutorial and learned some more stuff about 3D Coat. No matter how long you use a program, learning someone else's workflow is beneficial as an artist. Here is the 3D Coat tile before export. There is some repeating I don't like and will probably get back in there and fix that. There was a bug in 3D Coat when importing the bricks for the multi textured tile.

The bricks were sculpted in the Voxel room and the Exported to the Meshes Panel. They were then imported during the 3 x 3 textured tile process.


I converted the height map into a normal using Quixel Suite and then brought it into Houdini to render. I applied a UV Project node to a grid and then a material node right after the UV Project node.


Here it is in Houdini with a Normal and Displacement applied to a grid. No Color texture yet. That will come soon.


samedi 16 juillet 2016

Canister textured

Canister was textured in 3D Coat. A background prop that will have no interaction with any of the characters. Modeling and UVs were completed in Houdini. Here is the challenge with Houdini and 3D Coat. 3D Coat does not recognize the material assignments being exported from Houdini all the time. In the end, to make it easier I have to export each object separately.

Using Substance Painter, I can make a material  ID in Houdini and use it as a mask in Substance Painter. This seems to be an easier workflow when texturing a mass amount of objects. I will try to texture this object using Substance Painter. Here is a quick render using Mantra with 3D Coat.


jeudi 14 juillet 2016

Clouds in Houdini

Taking a break from my modeling in Houdini and getting back to my Houdini roots. I decided to give Cloud making a try in Houdini 15. Here is my first cloud. Making clouds seem to be a great challenge. Since any shape can be turned into a cloud, animating that cloud would be the better challenge.

Wall Panel UVs Houdini


Created the UVs for the modular Wall Panel. Still have one more design for this wall panel. The UVs were made in Houdini and took about 30-45 minutes to complete. Really easy to use tools in Houdini. The character and floor panels are used for reference.

 Select the geometry primitives and then create a group. Select the edges of where you want the UV Seams and then create a group.


I have a custom shelf that I use for most of my Poly Modeling. Instead of typing out the node, I just select the shelf button. It was quicker and easier to model objects this way.


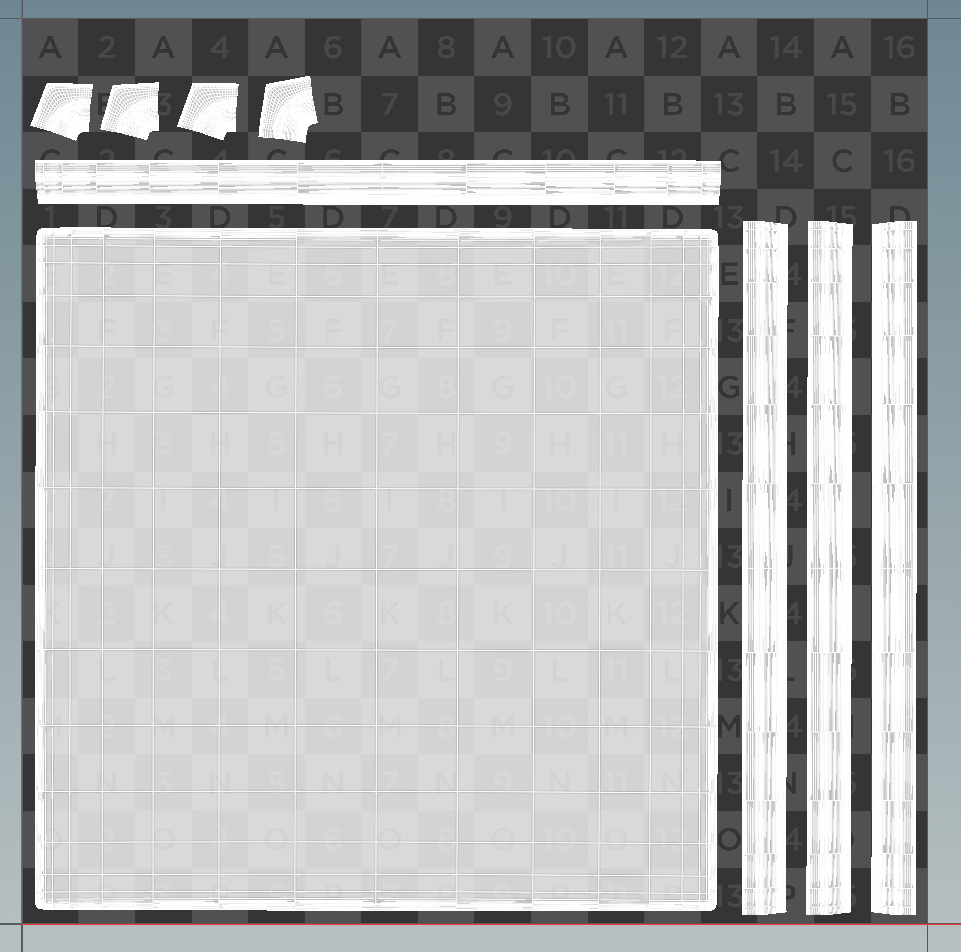
This is what the UV Flatten looks like after the groups have been added. I had to create an additional group with some edges that I missed when creating the initial Edge Group.


I also use a UV Layout node to correct the proportions in the UVs. This will also add edge padding to the UVs based on a determined distance set in Padding. 

Be careful when selecting 'Correct Island Area Proportions'! This may cause your UVs to lose the necessary Texel Density needed for texturing.
 

For any reason you need to save the UV Image out of Houdini to bring into Photoshop. Right Mouse Button (RMB) on any of the UV nodes and select Save - Texture UV to Image.  

Then set the File path and UV size that you want to export. Reminder Houdini has limitations set for Indie and Apprentice.


I hope this helps. More to follow soon!

mercredi 13 juillet 2016

Module Wall Panel

Started work on a new hard surface model in Houdini. A modular wall panel that will have two other variations. This is the first variation of the wall panel. There will be two more to follow. The figure and floor panels are used for reference. A inner and outer corner piece is also on the modeling to do list. This first piece still needs some work as it is incomplete.

The wall will be similar to the floor piece. It will be a practical design and not full of too many pieces that do not belong. I have never been a fan of just adding various shapes to fill a hallway, ceiling, or floor, etc. I understand that the Death Star was basically one giant Greeble. That was the Death Star, a giant space station.

Design is important when it applies to environment creation!


mercredi 6 juillet 2016

Floor Panel Texture

I was finally able to texture some items. I finished the floor panel texture. Rendered with outdoor lighting even though I painted this based on an indoor HDR Image. I painted the textures in 3D Coat, which has great texturing tools. A lot of control similar to Substance Painter. I changed the UVs in Houdini since there were bad UV seams.

In Houdini I will be adding Decals to break up the texture with footprints, wear and tear, and wheel marks.


mardi 5 juillet 2016

Lunchtime Session Modeling

Sadly no video for this modeling session. In the future I will record all of my lunchtime modeling sessions. This was a generic sci fi floor panel. Here is my issue with floor panels and sci-fi concepts. A lot of the panels look great and amazing. The concept artists come up with fantastic designs. My biggest issue is that they do not look usable. To many grooves in the floor! You would either trip while walking or something with small wheels would get stuck.

Here is my simple design that is going to be textured using substance painter. I still have to texture some other objects before this one. Traditional modeling was used in the creation of this floor panel. Modeling and UVs have been created using only Houdini 15.5. Some great tools. Total time for creating this floor panel was about 1 hour.